Saturday, August 30, 2014

Classroom Makeover

All of my friends have the cutest classrooms. Everything is organized. Everything is color coordinated. Everything is cute. I would walk into their rooms and think... "why can't my room look this pulled together?".  So I've spent countless hours this summer reading teacher blogs and searching Pintrest for great classroom ideas.

This past week I was allowed to start setting up my room.  It was a very bust week. I was fortunate to have the help of my grandmother and mother, I would have never gotten everything accomplished without them. Here is a look inside my newly designed classroom.


 I spent the summer going to garage sales, Goodwill, and my local library to purchase used book for my classroom library. I was even lucky enough to get a generous donation from my grandmother to purchase some new books though Scholastic. I got these amazing neon bins at the dollar store this summer. They are the perfect size for my leveled reading books.  Each bin contains leveled books for independent reading. I made hanging labels for each bin but I forgot to laminate them. Something to add to my To Do list.


I love making anchor charts with my students but it is hard to find room to display them. I saw on Pintrest that someone used a magnetic curtain rod to display anchor charts. I immediately went to Target and snagged one for my room. Now I can easily change out our focus ideas.  


A few years ago  I made Owl curtains for my classroom. The Owls did not go with my current theme so I went to the fabric store for inspiration.  I found these chevron and polka dot fabrics and knew I had to create something with them. My mom suggested I make pennants to hang over the window. Great idea Mom!!!


Last year the PTO generously bought all the Kindergarten classes these pocket chair covers.  They held up really well. They may be one of the most useful items for a classroom without desks. I've even seen some people using those stretchy book covers a quick alternative.

I am loving this  Free Pencil Banner I found on TPT. It pulls together my whole bulletin board.


I hope you enjoyed this quick tour of my room. I would love to see how others are decorating their room.You can check out more classroom makeovers over at The Primary Gal http://theprimarygal.blogspot.com/2014/08/extreme-makeover-classroom-edition.html.

Friday, August 15, 2014

DIY Saturday (Classroom Organization)


Hey everyone!

Summer is winding down, some of you may already be back in school.  I'm not allowed back in to my room for set up until the 25th.  I'm wasting no time by organizing at home. A colleague of mine shared this great classroom organizational tip for storing foam craft letters or magnet letters.


All you need is a a bead storage box from your local craft store. I selected the one with 18 fixed compartments.

I labeled each compartment so that the students will know where to find a specific letter. My box only has 18 compartments so some letters have to share. I always tell the students... In Kindergarten Everyone Shares (if only that was true). I have to admit that this was not a fun task. Next time I will turn this job into a center for the students (letter recognition, fine motor).

 My inspiration for this mind numbing task stemmed from my newest back to school product. Click to learn more.
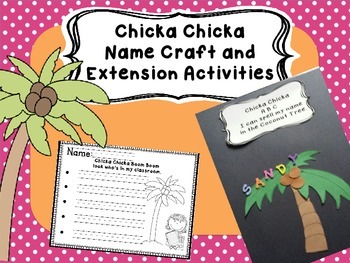
Chicka Chicka Name Craft
To save time I put all of the craft pieces and letters the students would need into individual zippy bags. These will look great with my newest back to school welcome poster...


Saturday, August 9, 2014

You Oughta Know... August Blog Hop


 Hey everyone!


This week I am taking a break from DIY Saturdays to join other amazing bloggers in this August's You Oughta Know Blog Hop. With school right around the corner I am going to focus on Parent Teacher Conferences.

Finding the right words for Parent Teacher conferences and Report Card comments can be challenging and time consuming. You have to make sure that your phrases convey the right attitude, they need to be unbiased and sincere. You shouldn't say the same thing about multiple students and you have to remember what you said each time. Here is how I  plan and organize  for my conferences. Click the link below to grab your  own editable copy for free. Glow and Grow Template


I start out by using this Grow and Glow conference sheet. I use the top portion to record grades and  general remarks (exceeds expectation,  good, doing well, needs improvement...) I use my grade book and student artifacts to complete this portion of the sheet. When speaking with parents you have to be accurate. Some parents may challenge what you say and it helps to have student artifacts to back you up. While I am organizing this  section I use a sticky note to jot down any impressions or thoughts for the comments. This will make filling out the  bottom section of the template easier.


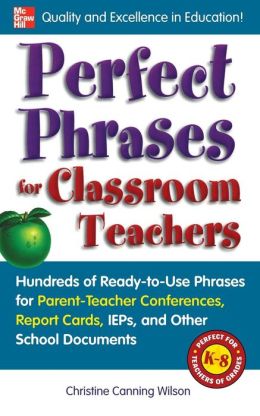
Next, I begin drafting my comments for the bottom part of the sheet. In this space I focus on areas of strength and ways to improve. I typically aim for 2 comments in the glow sections and 3 in the grow section. I use a variety of resources to make comment writing easier. I picked this book up at my local book store and I can't say enough about it. There are perfectly drafted sentences for all many different areas of concern.  The book also provides many useful positive comments for students who are doing just fine. I would highly recommend picking it up if you have a chance. Scholastic also provides teachers with sample report card comments on their website. 101 Report Card Comments

I hope this helps make conferences time a little easier. Don't forget to checkout more great tips from the bloggers below.

Thanks
for stopping by!

Saturday, August 2, 2014

DIY Plastic Containter Transformation 8/2

Hey Everyone!
Who's excited for the big TPT sale Monday? My cart is already filled to the brim with awesome resources for next year. Yes, even though I am a TPT seller I am a huge TPT customer. I have been busy finishing last minute products for the sale, but I was able to squeak out a quick DIY project for all of you. Stop by  My TPT Store to see what's new.


DIY Plastic Container Transformation.

Everyone has at least one plastic storage bin hanging around. They typically aren't cute, or extremely durable, but we all have one. I was recently in the market for a storage bin to hold the extra classroom supplies. I found this one on sale for $5 at Walmart!!
What a bargain they are typically at least $20. The only problem is....
It doesn't match my new classroom color scheme.
After the post you will never pass up a good bargain for the sake of the right color.

Rust-oleum makes glossy spray paint that bonds to plastic with no need for primer or sanding!!  Of course I selected "Seaside" to make over my storage bins.
  
Here's what you need...
1. Something plastic that needs a makeover
2. Glossy Plastic Spray Paint
3. Garbage bags or Newspaper,
4. Dry, low wind day.


Here's what to do...
1. Wipe down your piece to remove any dust or residue from the store, this ensures a smooth finish.
2. lay down tons of news paper or garbage bags so you don't have rainbow grass when you are done.

3. Shake the can and spray away. The piece should by dry to the touch in 20 minutes and fully dry after 24 hours. You may need to go back to apply a second coat if you missed any spots. I missed the inside corners and had to go back and fill them in the next day.

I had a little spray paint left in the can for another fun DIY project. Thanks for stopping by.


Thursday, July 31, 2014

Back To School Sale!

This year I will be participating in the Teachers Pay Teachers Back to School Sale. My whole store will be 20% off plus the site gives you an extra 10% off! The sale will be August 4-5. Click the link below to check out my newest products and start filling up your shopping carts.

My Store

Don't forget to check out what these other great sellers have.

Wednesday, July 30, 2014

Summer Tutoring


http://www.teacherspayteachers.com/Product/CVC-clip-and-build-Task-Cards-1316621 Looking for a hands-on phonics activity for center work or independent practice? his set included 30 cards focusing on 5 short vowel sounds (a,e,i,o,u). Each vowel has 6 corresponding cards and an answer key. I even color coded the cards by vowel sound for easy organization and cleanup.

Hey everyone!
This is my first summer not working full time. In the past I always worked at a summer camp or taught summer school, but this summer I'm free.  Although I LOVE the free time, I needed some extra cash to help sustain me through summer.

I started tutoring a student this summer to keep my pockets full. Sounds like a great plan right? The only problem is I left all of my personal resources in my classroom this year and I can't get back in there to take anything out.

I found some great resources on Teacher Pay Teacher to help supplement my instruction, but I still needed a hands-on activity.  Out of necessity I created these CVC  Clip and Build Task Cards. I had the student write letters A-Z on clothes pins (I had him make a few extra vowel clips so that he could build more than one word at a time). I wrote the answers on the back of the cards so that he could check his work . I also color coded the cards by vowel sound so that he could easily focus on one sound at a time.

Click below to snag your own.


CVC Clip and Build Task Cards

Saturday, July 26, 2014

DIY Saturdays


Hey everyone! I'm busy getting ready to September how about you? 

I'm the type of person who can't just veg out and relax on the couch all day. I need to have something to do or someplace to go. I'm starting a new series focusing on different DIY (Do It Yourself) projects you can complete over the weekend.

The first project I want to focus on is a great back to school idea!

DIY Pocket Charts

As some of you may know I recently changed my classroom decor from Dots on Turquoise to bright Chevron. I was able to keep some of my cute creations. Yay!!!! I am keeping  teal/turquoise in my new color pallet but in order to add  the other colors I had to recreate some of my classroom favorites.


I know they make really cute Chevron library pockets at the teacher store, but my little Kinders will not be able to read the labels (picture clues are a must in my class). This year I recreated my  Class Job Chart using images I found on Mycutegraphics.com Picture clues help my students understand their job function and take ownership of the classroom.  So lets get started!!

Materials:
Poster Board:
Envelopes (3 X6)
Images
Printer
Scissors
Laminator
X-acto Knife

Steps:
After you decided what type of pocket chart you need, you have to design the outside of your pockets. I used Photo Shop to easily customize my images. Once your  images are complete you have two options...  
  • A print the image directly to the envelop saving you time.
  • B print the image on paper and then cut and glue it to the envelope.
Unfortunately my printer would not accept the envelopes as a printable surface so I had to take the long route. If you are going with Plan B you have to first seal the envelop so that you have a complete pocket. Then you can glue your image and trim the excess portion of the envelope off the top.

Once all your envelopes are complete you can begin laying them out on your poster board. Now that everything is in place glue the envelopes to the poster board.

Run your poster through your local laminator. I would suggest using a slower setting so that the pockets don't lift up and to guarantee a tight seal.

Some of you may be thinking... WAITE!!!! How am I supposed to use the pockets if they are sealed by lamination? This is where the X-acto Knife comes in. You have to carefully slit open the top of the pockets so that you can use them.
Now you are ready to start using your pocket chart!

Thanks for stopping by and good luck on your new DIY Saturday project.

Check out Teacher Times Two to see how other teachers are getting ready for September.


Teacher Times Two